
12/2010 Davis Mountains QHY8 Setup
The QHY8 CCD Camera is what's hanging off on the lower-right. I taped the 3 connected wires to the drawtube to provide strain relief. See my Equipment Page for more pictures and details.
This page talks about the QHY8 CCD camera and workflow. Pictures from the camera are are here. I acquired the QHY8 CCD camera in Sept 2008. (I have the version sold by Starzonia. Beware that there are multiple versions of this camera sold by vendors world-wide, so your camera may well be different than mine). More info about Processing Astrophotos is here. My main Astronomy and Camera Equipment page is here.
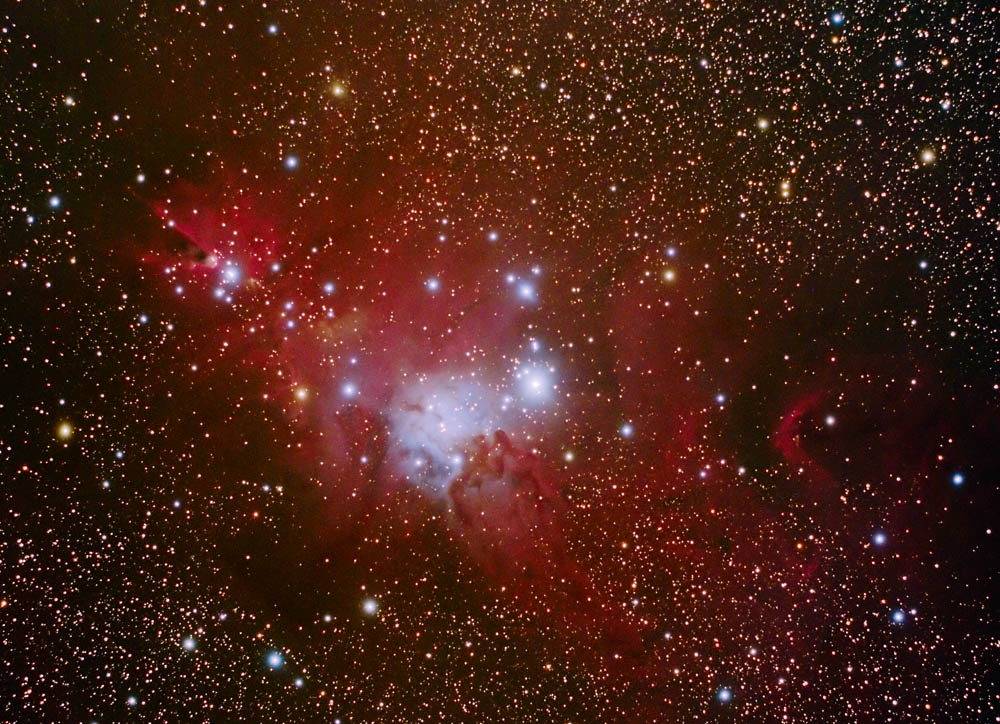
QHY8 Example: Christmas Tree Cluster & Cone Nebula Area
I am using the recommended workflow in Nebulosity and then use Registar and Photoshop:
Capture in Raw (using 5 minute sub exposures)
Apply a Bad Pixel Map
Apply a Flat and Bias
Demosaic each image
Covert to Tiff format
Stack using Registar
Process in Photoshop
When using a H-alpha filter, I use the channel mixer to turn the image to monochrome using only the red channel. (See more info on narrowband filtering with this camera at the bottom of my Narrowband Imaging page.)
May, 2010: I sometimes use Deep Sky Stacker, Drizzle Image Processing, and AIP4Win's deconvolution filter to enhance the detail in the dust lane area.
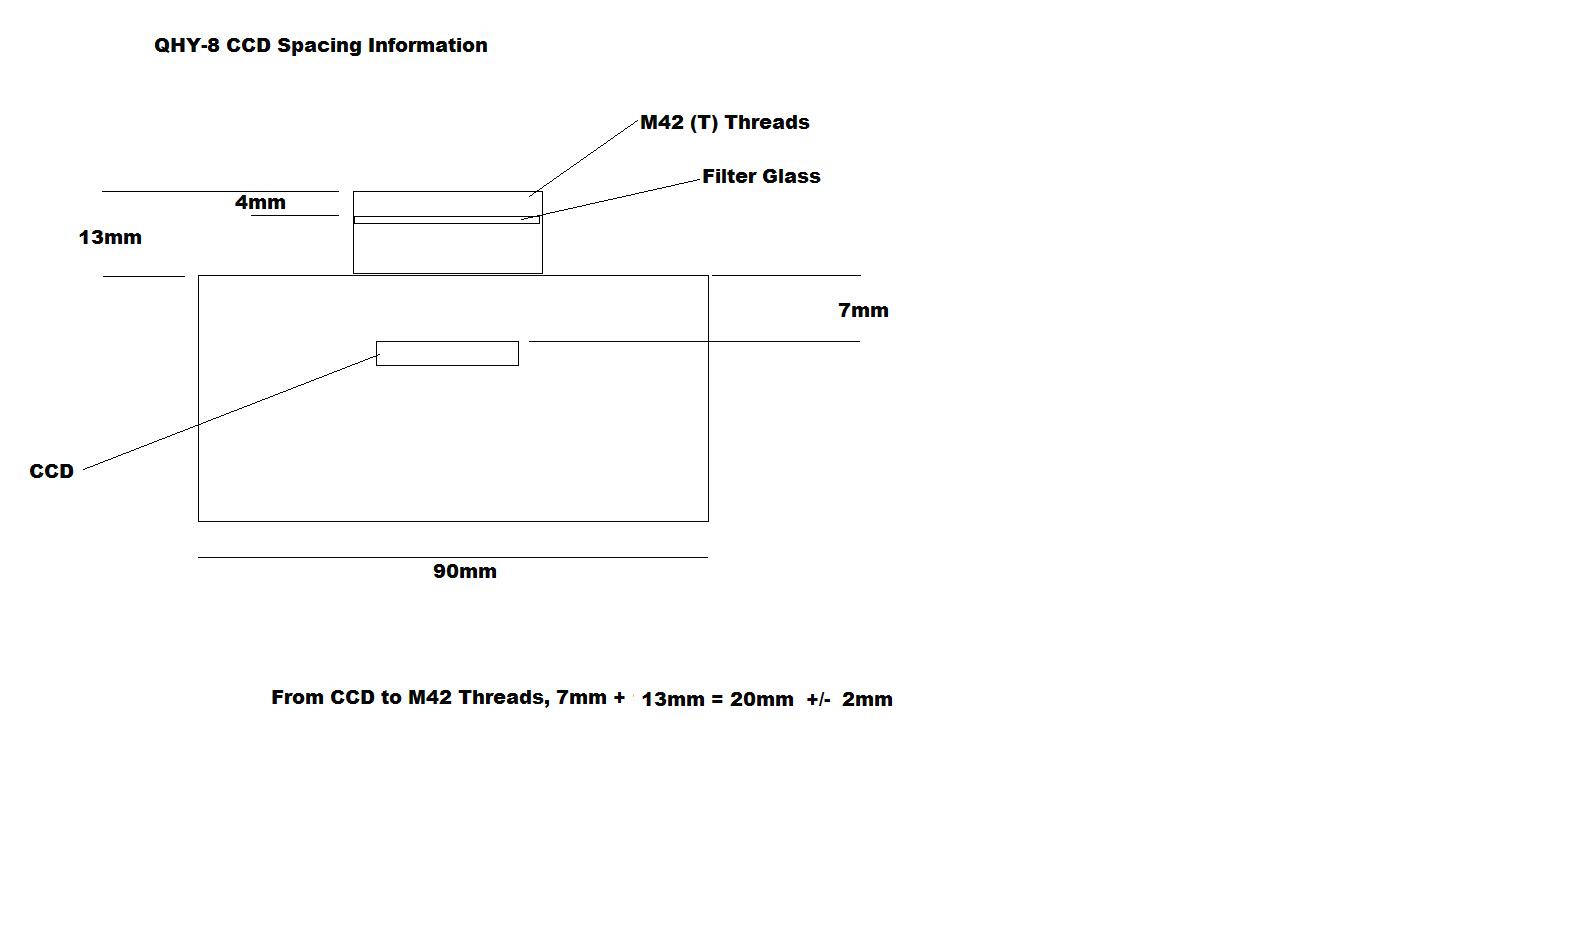
Backfocus Info below. The distance shown as 7mm is should really be 7.8mm. What it means for my TOA 130 is that from the camera body to the end of the adapters I should have 13mm plus 35 mm distance = 48mm minus that .8 = 47.2 mm. I'm getting 45 and 49mm with two adapters.
Driver and Software Discussion: As of 4/2010 I am doing well with a new set of drivers from the QHY8 downloads web site and Nebulosity 2.2.4.!
[2015: Links removed as qyyccd is now listed as a compromised site.] As of 1/2010 I have killed the old QHY8 ("Tom's Drivers") in favor of the drivers from the QHY8 downloads web site. See this discussion about how to remove old drivers first! I also upgraded to Nebulosity v2.2.1. It looks like a few annoying things might be fixed, like the inability to zoom in on an area of choice during frame and focusing.
Unfortunately, I'm getting the streaking with the new drivers. I'll post on the QHY8 group and see what happens! Update: Using the "512" drivers eliminated the problem!
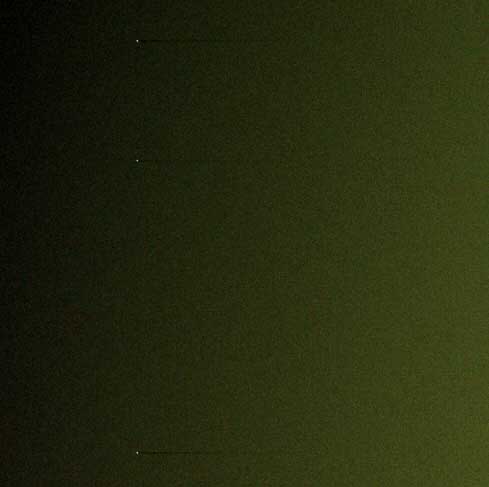
Streaks from QHY8 Flat with "1024" drivers...
Found this: http://qhyccd.com/ccdbbs/index.php?topic=1388.0
Old discussion: I ran into the streaking problem some users experience when using the stock drivers. This seems to be caused by a failure to handle activity or delays on the USB bus while downloading an image from the camera. Some users have this problem and others don't. (There is a posting on the qhyccd.com site that discusses this problem and shows some code that fixes it.) Fortunately, for me this problem does not exist when using Tom's libusb drivers. Summing up, what I have found is that Tom's drivers with Nebulosity 2.0.6 is working well and that's what I would recommend to others. The nuance is that you need to select a different camera in Nebulosity based on which drivers you use.
Still earlier, outdated notes: I'm initially began using the "stock" drivers and "Nebulosity" software (v2.03b) to capture images with great success. I tried the "beta drivers" and found the fine focus function did not work. (Others have reported this issue does not exist with later versions of Nebulosity and I am working fine with Nebulosity 2.0.6. I have also determined the fine focus does not work for exposures of .1 sec. or less; this may have been the problem all along.) I also had an initial issue with the camera where it captured completely black images. This turned out to be caused by the "S-VHS style" cable not being plugged into the camera completely.
Do Not Mix Driver Output: I have found that images output from one version of the drivers versus the other are not compatible in Nebulosity when using Raw processing.
Mounting a camera lens to the QHY8: I bought an SBIG Nikon lens adaptor (SBIG CLA-7 for Nikon, part SB-CLA7NK at OPT). It did not come to focus with my 18mm Nikon lens, but did with my 55mm Nikon micro lens. I would like to hear about other's experiences with mounting camera lenses to the QHY8, email me here.
Camera details: (RL -> Distance from chip to surface to front of camera is 21mm) It is a large-format (APS-size) one-shot color camera with a 28mm diagonal chip size. Some info: * Total pixel: 3110 x 2030 * Active pixels: 3032 x 2016 * Pixel Size: 7.8um x 7.8um square * Color method: RGB BAYER film on CCD * D50 -> Standard DX size (23.7 x 15.6 mm)
Effective sensor area: 28.4 mm diagonal * Readout noise: 8-12 e @600 Kpixel/s * QE: 60% at green (Peak), 50% at blue and H-alpha * Microlensing on chip * Progressive Scan * ABG: -110dB * 16bit ADC with CDS and Preamp * USB2.0 High Speed interface * T-thread mounting * Rugged custom-fit Pelican carrying case * Includes both AC and 12v DC adapters * Dimensions: 3.5" x 3.5" x 2.25" * Weight: 1.2 lbs.(0.55 kg). Additional info on the camera experience (astro geek ramblings): I've had a few struggles getting used to the camera and the new capture/processing methods associated with a CCD. I have upgraded from DSLR Astro-imaging, but have a lot of image processing experience. So far I'm finding the "out of the camera" colors are more muted out of the CCD vs my DSLR, due to the use of "raw" processing I think, with the associated need for extreme stretching. Out of the Canon DSLRs, I would do a non-linear stretch out of ImagesPlus and start with a more colorful image. The bottom line is it took 3 deep-dive processing exercises to get a PacMan version I liked.
For more info on this camera go to: http://tech.groups.yahoo.com/group/QHYCCD/ and http://qhyccd.com/QHY8.html/ [2015 link removed]
By way of comparison, here's the info on my Canon 20D, 20Da DSLR:
Canon 20Da has 6.4 micron pixels
(and diagonal is 27mm assuming 15*22.5 sensor size)
arc sec per pixel = 1.31 at 1000 mm
arc sec per pixel = 1.88 at 700 mm
1000 mm = 39 inches focal length
The Canon 20D's 8 megapixel sensor has a 1.6 crop factor and a sensor size of 15X22.5mm. The sensor is about .89 inches wide with resolution of 3504 x 2336 pixels. Dividing the width resolution by the width of the sensor in inches shows us that we have about 3937 ppi on this camera's sensor.
In my experience with both a DSLR (Canon 20Da, original and then "Hap modified") and QHY8 CCD camera, darks are much less of an issue with the QHY8. I have found that it's very important to take contemporaneous darks with the DSLR. Especially on nights where there are significant temperature changes this is a major problem. This issue isn't just ambient temp, but also the camera's internal temps and I think the orientation can also play role, as can swapping a "warm" CF card with a cold one. Plus, my DSLR gets an amp glow thing going when temps get down to around freezing, green is out of control on warm nights, and the dark river thing is maddening. For best results I would spend time taking darks at night every 60-120 minutes, bottom line.
With the QHY8 I just built up a library of "warm" and "cold" darks, and use Nebulosity's "bad pixel" function. The camera is not free of noise but it is far and away easier to deal with than with the DSLR.
This is not to say you can't achieve excellent results with a DSLR. I just find it easier with the QHY8. See more thoughts on the bottom of my Canon 20Da Page.
Post on flats1
Message #2961 of 2969 < Prev | Next > Re: Flats and Bias check
I've found getting good flats is a major challenge. If you're just shooting galaxies or "small" objects its not that big a deal as you can always use something like gradientXterminator to correct everything (or just crop.) But for big nebulae flat is good. See message 1434 in this group for a discussion that would imply your flats are too bright and getting into the non-linear range of camera. I found I had much better results targeting 12-15K avg for my flats (as I recall, can't check right this minute.) I use nebulosity to calibrate and results may vary with other software.
If I follow one of your concerns, after you calibrate a frame the overall level or your real exposures will drop as you subtract your bias. That's normal and good. You stretch the image from there.
-Dick Locke
Post on flats2
Message #2964 of 2969 < Prev | Next > Re: Flats for OSC cameras
Per my other message, I think 32K is too high for flats with the QHY8. For reference, I'm using Tom's drivers with default gain/offset. I think you want to keep it to less than 20K. If someone else has more specific advice or findings around the optimal exposure for flats please speak up ;-)
In terms of making the flats, I do t-shirt flats and/or sky flats.
If you do t-shirt flats on a clear day you can experiment easily with different exposures. Do a set at 10K, a set at 20K, a set at 30K, then test against your astro shots and see what's best. T-shirt flats are at once easy, but tricky. Easy in that you just need a clear day, but tricky because the camera isn't 100% light tight and also you need to make sure the sun isn't hitting any part of the t-shirt. I rigged up a shroud to shelter the camera from direct light, and another thing to block the sun from hitting the t-shirt.
Flats at dusk are tricky because first of all it has to be reasonably dark before you can get flat's that are dim enough, and then the light is changing so rapidly you need to adjust the exposure time with every few images to maintain the exposure target you're looking for. Then, of course, you start picking up stars. I rotate the camera or move the scope between each flat exposure and do a median combine on the flats to average out the stars.
If you have time, I believe it is best to do sky flats as it gets dark. Then test, and see if these flats are better than your t-shirt flats, and go from there. Keep your sensor free from dust and you'll build up a library of flats you can re-use.
In terms of overall workflow, just follow the steps suggested in the Nebulosity manual, they work well.