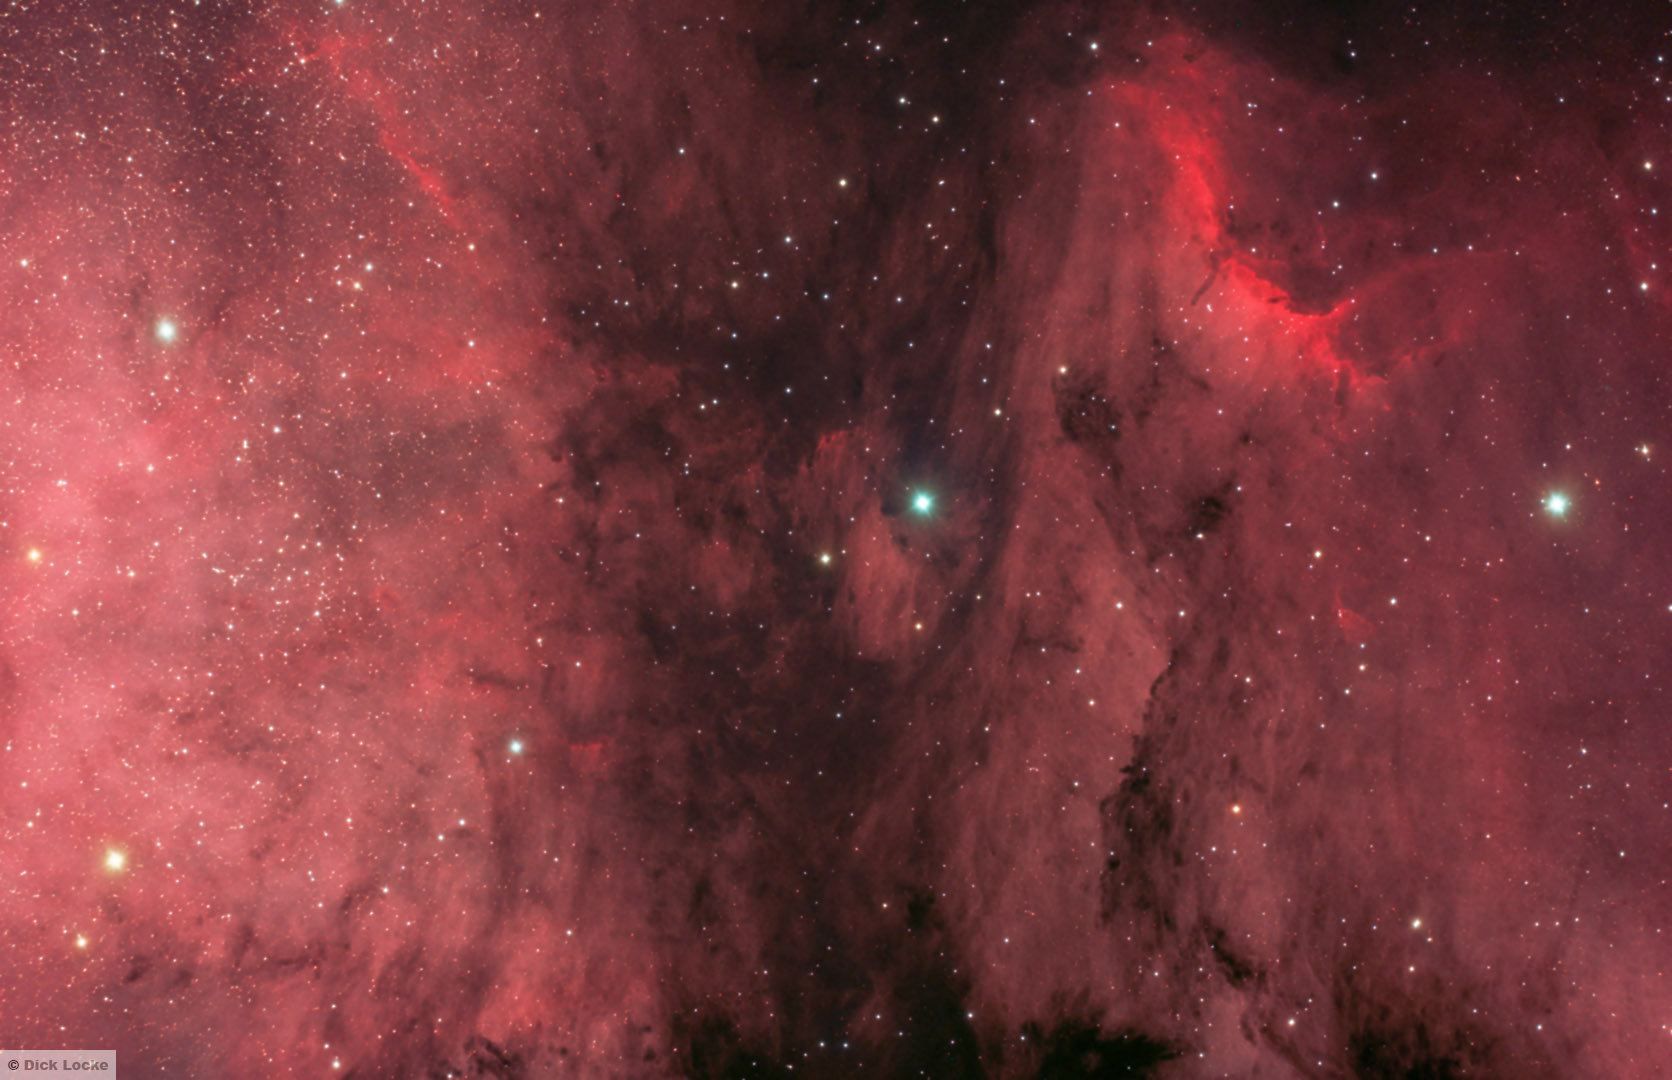
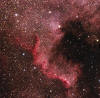
Pelican Nebula Area: Over 10 Hours Total Exposure
Cygnus Area Image Index (Pictures of Objects in the Cygnus Area)
The Pelican Nebula is on the mid and right parts of the image, and you're seeing part of the North American Nebula on the left. What are you looking at? From the APOD: The Pelican Nebula lies about 2,000 light-years away in the high flying constellation Cygnus, the Swan. Also known as IC 5070, this cosmic pelican is appropriately found just off the "east coast" of the North America Nebula (NGC 7000), another surprisingly familiar looking emission nebula in Cygnus. The Pelican and North America nebulae are part of the same large and complex star forming region, almost as nearby as the better-known Orion Nebula. From our vantage point, dark dust clouds ... help define the Pelican's eye and long bill, while a bright front of ionized gas suggests the curved shape of the head and neck...

Check out my wider, narrowband image of the North American and Pelican Nebula areas here.
Processing Details: I processed this image to preserve and highlight the low level nebulosity and dust clouds in the area. The long exposure time helps keep the noise to a minimum (compare with the image below.) Additionally, I applied the Neat Image noise filter to the darker areas in the Red and Blue channels, along with a Gaussian blur to the dark areas in RGB. I also tried to keep the bright red areas from being blown out, and used Noel Carboni's actions to shrink the star sizes. I performed a 100%, 1 pixel, 4 level sharpen after resizing before converting to jpeg. Image Details: 635 minutes or 10.58 hours total exposure. Sub-exposures include 52*5 minutes exposure with the QHY8 "one shot color" CCD camera with the Takahashi TOA 130 Telescope (a 5" APO refractor) with reducer, blended with 39*5 Ha frames and 36*5 O3 frames with the SBIG ST-8300m (monochrome) CCD camera with the FW8-8300 filter wheel, Astrodon narrowband 36mm filters, and the Takahashi FSQ-85 telescope with reducer, AP 900GTO mount. I processed all 3 images independently, then using the RGB image as a base, I blended the Ha image into the luminosity and red channels, and the O3 image into the blue and green channels.
Other narrowband pictures with this combination, and more info, are at this link. Other astronomy pictures from the Fall 2011 trip are here.
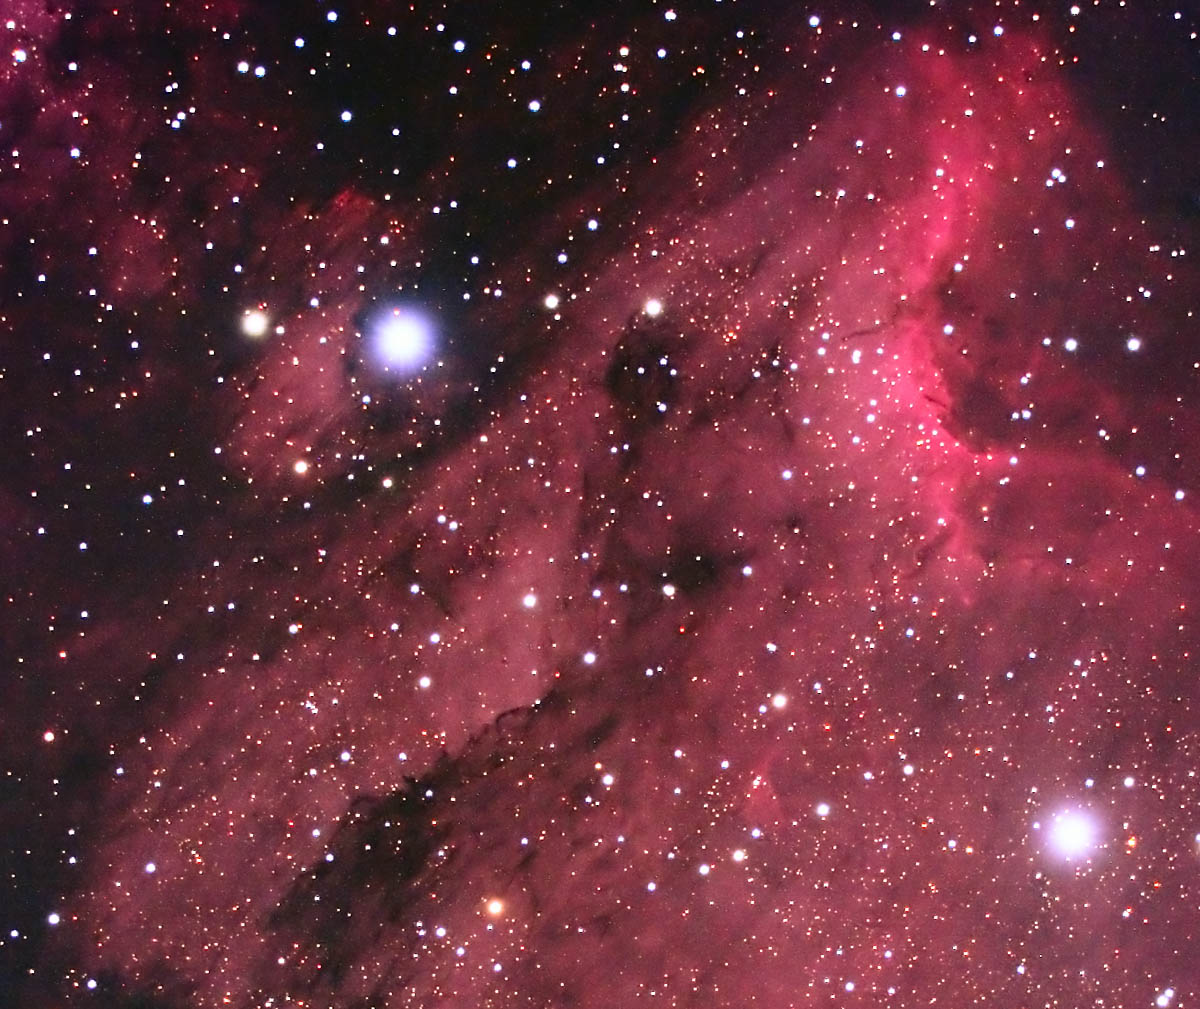
Above: Close-up, using a crop of this larger image.
Combination of 14 x 4 minute images for 56 minutes of total exposure time at ISO 800. Takahashi TOA 130, Losmandy G11, Canon EOS 20Da, no noise reduction, darks, or flats. Captured 11/21/2005 from the North Houston Astronomy Club Neal dark sky site. Ambient temperature 45-50 degrees F. From SEDS: "Close to NGC 7000 lies the Pelican Nebula, I 5070. This nebula and its neighbour, I 5067, are extremely faint for telescopic observations. Long exposure photographs show that they are interesting objects, too."
The larger image is maybe 85% of the frame. This is 1200 pixels wide, shrunk from the origin 1822 pixels in the original image. Blowing it up this big does expose a few warts in the image, including less than perfect guiding, as well as noise made visible by the extreme image manipulations required to bring out this much detail. I'll still trying to develop a workflow I can be happy with with the DSLR and no in-camera noise reduction.
I've often thought that DSLR images can seem relatively flat and monochromatic when compare with the film images I've been seeing (and producing) over the years. This is true especially in the reds, where DSLRs generally have a relatively weak deep red channel. Popular astrophotography films have had a strong red response, including Kodak's PJ400, LE 400, and Supra 400 (all out of production), as well as Kodak E200 and Fuji's SHQ 200 (both currently still available). A reason red is so important: The Hydrogen Alpha nebula, such as the Pelican above, glows at a wavelength of about 656 nanometers. Any sensor, be it film or CCD/CMOS chip, that has poor response in this area will be omitting a critical component of the image. My previous DSLR, a Nikon D100, had a weak H-alpha response, along with relatively high noise. The Canon EOS 20Da I'm now using is a dramatic improvement in both these area. This camera has a modified design especially for astrophotography, but still shoots perfectly good daylight images without any special filters.
There are lots of ways to "add color" to a flat DSLR astronomy image. A classic: apply an "S" curve to the image. (Image->Adjustments->Curves, pull up the right/bright part of the curve, and pull down the left/dark part of the curve.) You can use Image->Adjust->Hue/Saturations, but purists shutter at this.
However, using this LAB technique has advantages as enumerated in Dan Margulis' books including "Photoshop Lab Color" and "Professional Photoshop." It's pretty simple.
Convert Image into Lab. Alt-I-M-L gets you there (Image->Mode->Lab).
View the "a" channel. Ctrl-1 gets you there. It will look very strange.
Here's a trick: Hit the ` key to the left of the # 1. This displays the image in color, but with a channel selected for any manipulations.
Bring up the curves function. Now, make the curve steeper, but keep the center point the same. The curve is a straight line. Do the same with the b Channel. See example below.
How far to go is a judgment call. If you'd like the subtly change the overall color balance, you can vary the line so it doesn't exactly cross the center point. Don't go too far with this!
Other things you may wish to do in lab include blurring the a and b channels a bit, or maybe a lot, to help get rid of noise.
Adjust the Luminosity channel. Pulling up the curve to better show the dim parts of your image will tend to flatten colors/reduce color saturation.
Ctrl-' gets you back to all channels selected
Convert back to RGB. Alt-I-M-R gets you there.
Check my M31 page, including the images at the grid at the bottom of the page, showing where I started color-wise, and where I ended up.
Caveats: There are many, but this only works well with images that are not already highly colorful. This technique also tends to exaggerate chromatic aberrations around stars, so this may need to be mitigated.
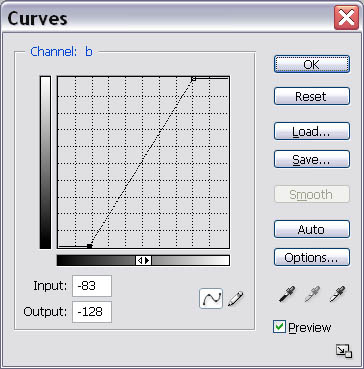
Above: Adjusting the b channel by equal amounts. By making the curve steeper, you increase the visible differences between colors, increasing the color range of flat images.
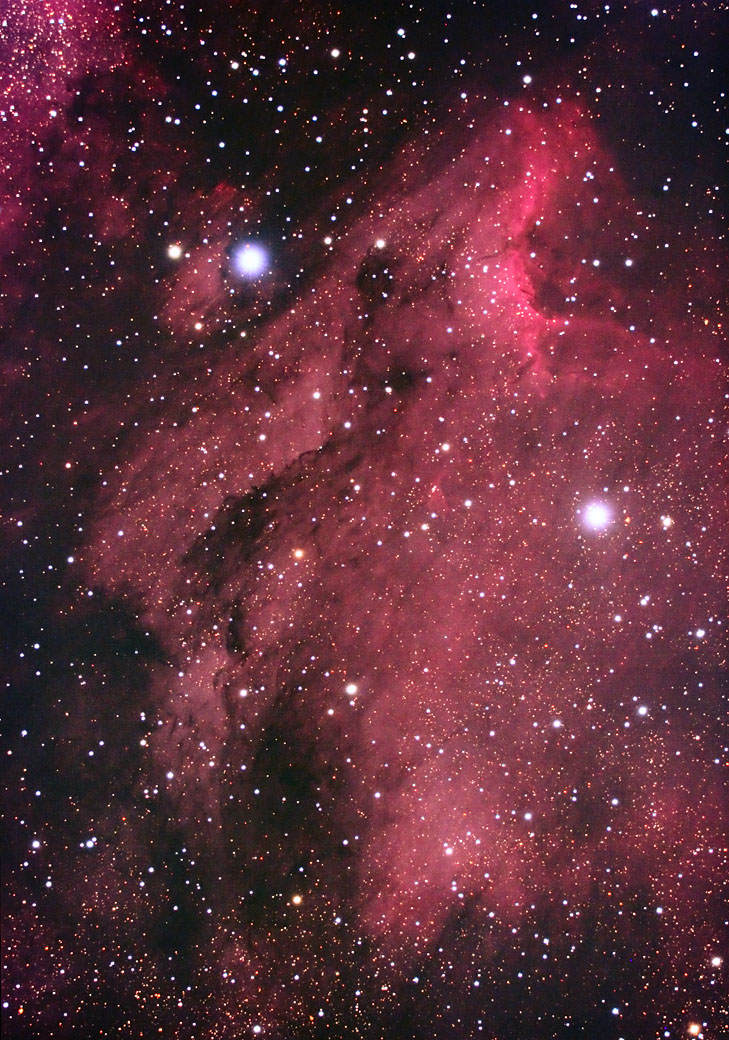
Above: Smaller version of the Pelican DSLR shot. Combination of 14 x 4 minute images for 56 minutes of total exposure time at ISO 800. Takahashi TOA 130, Losmandy G11, Canon EOS 20Da, no noise reduction, darks, or flats. Captured 11/21/2005 from the North Houston Astronomy Club Neal dark sky site. Ambient temperature 45-50 degrees F. From SEDS: Close to NGC 7000 lies the Pelican Nebula, I 5070. This nebula and its neighbor, I 5067, are extremely faint for telescopic observations. Long exposure photographs show that they are interesting objects, too.
North American Nebula with 20Da
Astronomy Pictures: Dick Locke's Astrophoto Gateway page....
Copyright © by Dick Locke. All Rights Reserved.
Contact and Image Use Information